完全なCloudFormationテンプレート
AWSTemplateFormatVersion: '2010-09-09'

Description:
  Single-AZ WordPress Blog Site

Parameters:
  DatabaseMasterName:
    Description: Database Master User Name
    Type : String
    Default: admin
  DatabaseMasterPassword:
    Description: Database Master User Password
    Type : String
  DatabaseName:
    Description: Database Name
    Type : String
    Default: wordpress
  EngineVersion:
    Description: Engine Version
    Type : String
    Default: 8.0.35
  EC2AMIId:
    Description: AMI ID
    Type : String
    Default: ami-0d0150aa305b7226d
  EnvironmentName:
    Type: String
    Default: Test-CFn-WP
  KeyName:
    Description: The EC2 Key Pair to allow SSH access to the instance
    Type: "AWS::EC2::KeyPair::KeyName"

Resources:
  # ------------------------------------------------------------#
  #  VPC
  # ------------------------------------------------------------#
  VPC:
    Type: AWS::EC2::VPC
    Properties:
      CidrBlock: 10.0.0.0/16
      InstanceTenancy: default
      EnableDnsSupport: true
      EnableDnsHostnames: true
      Tags:
      - Key: Name
        Value: !Sub ${EnvironmentName}-VPC

  # ------------------------------------------------------------#
  #  Internet Gateway
  # ------------------------------------------------------------#
  InternetGateway:
    Type: AWS::EC2::InternetGateway
    Properties:
      Tags:
      - Key: Name
        Value: !Sub ${EnvironmentName}-VPC-IGW
  AttachGateway:
    Type: AWS::EC2::VPCGatewayAttachment
    Properties:
      VpcId: !Ref VPC
      InternetGatewayId: !Ref InternetGateway

  # ------------------------------------------------------------#
  #  Route Table
  # ------------------------------------------------------------#
  RouteTable:
    Type: AWS::EC2::RouteTable
    DependsOn: AttachGateway
    Properties:
      VpcId: !Ref VPC
      Tags:
      - Key: Name
        Value: !Sub ${EnvironmentName}-VPC-RTB
  Route:
    Type: AWS::EC2::Route
    DependsOn: AttachGateway
    Properties:
      RouteTableId: !Ref RouteTable
      DestinationCidrBlock: 0.0.0.0/0
      GatewayId: !Ref InternetGateway

  # ------------------------------------------------------------#
  #  Public Sunbet A
  # ------------------------------------------------------------#
  PublicSubnetA:
    Type: AWS::EC2::Subnet
    DependsOn: AttachGateway
    Properties:
      AvailabilityZone: "ap-northeast-1a"
      CidrBlock: 10.0.1.0/24
      MapPublicIpOnLaunch: 'true'
      VpcId: !Ref VPC
      Tags:
      - Key: Name
        Value: !Sub ${EnvironmentName}-VPC-PublicSubnet-A
  PublicRouteTableAssociationA:
    Type: AWS::EC2::SubnetRouteTableAssociation
    Properties:
      SubnetId: !Ref PublicSubnetA
      RouteTableId: !Ref RouteTable

  # ------------------------------------------------------------#
  #  Private Sunbet A
  # ------------------------------------------------------------#
  PrivateSubnetA:
    Type: AWS::EC2::Subnet
    Properties:
      AvailabilityZone: "ap-northeast-1a"
      CidrBlock: 10.0.2.0/24
      MapPublicIpOnLaunch: 'false'
      VpcId: !Ref VPC
      Tags:
      - Key: Name
        Value: !Sub ${EnvironmentName}-VPC-PrivateSubnet-A

  # ------------------------------------------------------------#
  #  Public Sunbet C
  # ------------------------------------------------------------#
  PublicSubnetC:
    Type: AWS::EC2::Subnet
    DependsOn: AttachGateway
    Properties:
      AvailabilityZone: "ap-northeast-1c"
      CidrBlock: 10.0.3.0/24
      MapPublicIpOnLaunch: 'true'
      VpcId: !Ref VPC
      Tags:
      - Key: Name
        Value: !Sub ${EnvironmentName}-VPC-PublicSubnet-C
  PublicRouteTableAssociationC:
    Type: AWS::EC2::SubnetRouteTableAssociation
    Properties:
      SubnetId: !Ref PublicSubnetC
      RouteTableId: !Ref RouteTable

  # ------------------------------------------------------------#
  #  Private Sunbet C
  # ------------------------------------------------------------#
  PrivateSubnetC:
    Type: AWS::EC2::Subnet
    Properties:
      AvailabilityZone: "ap-northeast-1c"
      CidrBlock: 10.0.4.0/24
      MapPublicIpOnLaunch: 'false'
      VpcId: !Ref VPC
      Tags:
      - Key: Name
        Value: !Sub ${EnvironmentName}-VPC-PrivateSubnet-C

  # ------------------------------------------------------------#
  #  ALB Security Group
  # ------------------------------------------------------------#
  ALBSecurityGroup:
    Type: AWS::EC2::SecurityGroup
    Properties:
      GroupName: !Sub ${EnvironmentName}-ALB-SG
      GroupDescription: Allow HTTP and HTTPS access from internet
      VpcId: !Ref VPC
      SecurityGroupIngress:
        # http
        - IpProtocol: tcp
          FromPort: 80
          ToPort: 80
          CidrIp: "0.0.0.0/0"
        # https
        - IpProtocol: tcp
          FromPort: 443
          ToPort: 443
          CidrIp: "0.0.0.0/0"
      Tags:
        - Key: Name
          Value: !Sub ${EnvironmentName}-ALB-SG

  # ------------------------------------------------------------#
  #  ALB
  # ------------------------------------------------------------#
  ApplicationLoadBalancer:
    Type : AWS::ElasticLoadBalancingV2::LoadBalancer
    Properties:
      Name: !Sub ${EnvironmentName}-ALB
      Scheme: "internet-facing"
      SecurityGroups:
        - !Ref ALBSecurityGroup
      Subnets:
        - !Ref PublicSubnetA
        - !Ref PublicSubnetC
      Tags:
        - Key: Name
          Value: !Sub ${EnvironmentName}-ALB

  # ------------------------------------------------------------#
  #  Target Group
  # ------------------------------------------------------------#
  ALBTargetGroup:
    Type: AWS::ElasticLoadBalancingV2::TargetGroup
    Properties:
      HealthCheckPath: /healths/wp-check
      HealthCheckEnabled: True
      Name: !Sub ${EnvironmentName}-ALB-TG
      Port: 80
      Protocol: HTTP
      Tags:
        - Key: Name
          Value: !Sub ${EnvironmentName}-ALB-TG
      Targets:
        - Id: !Ref EC2Instance
          Port: 80
      VpcId: !Ref VPC

  # ------------------------------------------------------------#
  #  ALB Listner
  # ------------------------------------------------------------#
  ALBListener:
    Type: AWS::ElasticLoadBalancingV2::Listener
    Properties:
      DefaultActions:
        - TargetGroupArn: !Ref ALBTargetGroup
          Type: forward
      LoadBalancerArn: !Ref ApplicationLoadBalancer
      Port: 80
      Protocol: HTTP

  # ------------------------------------------------------------#
  #  EC2 Security Group
  # ------------------------------------------------------------#
  EC2SecurityGroup:
    Type: AWS::EC2::SecurityGroup
    DependsOn: ALBSecurityGroup
    Properties:
      GroupName: !Sub ${EnvironmentName}-EC2-SG
      GroupDescription: Allow HTTP and HTTPS from ALBSecurityGroup
      VpcId: !Ref VPC
      SecurityGroupIngress:
        # HTTP
        - IpProtocol: tcp
          FromPort: 80
          ToPort: 80
          SourceSecurityGroupId: !Ref ALBSecurityGroup
        # HTTPS
        - IpProtocol: tcp
          FromPort: 443
          ToPort: 443
          SourceSecurityGroupId: !Ref ALBSecurityGroup
      Tags:
        - Key: Name
          Value: !Sub ${EnvironmentName}-EC2-SG

  # ------------------------------------------------------------#
  #  EC2 Role for SSM
  # ------------------------------------------------------------#
  EC2RoleforSSM:
    Type: AWS::IAM::Role
    Properties:
      RoleName: !Sub ${EnvironmentName}-SSM-role
      AssumeRolePolicyDocument:
        Version: 2012-10-17
        Statement:
          - Effect: Allow
            Principal:
              Service:
                - ec2.amazonaws.com
            Action:
              - sts:AssumeRole
      Path: /
      ManagedPolicyArns:
        - arn:aws:iam::aws:policy/AmazonSSMManagedInstanceCore

  # ------------------------------------------------------------#
  #  EC2 Instance Profile
  # ------------------------------------------------------------#
  EC2InstanceProfile:
    Type: AWS::IAM::InstanceProfile
    Properties:
      Roles:
        - !Ref EC2RoleforSSM

  # ------------------------------------------------------------#
  #  EC2
  # ------------------------------------------------------------#
  EC2Instance:
    Type: AWS::EC2::Instance
    Properties:
      AvailabilityZone: "ap-northeast-1a"
      BlockDeviceMappings:
        - DeviceName: /dev/xvda
          Ebs:
            VolumeSize: 8
            VolumeType: gp2
      ImageId: !Ref EC2AMIId
      InstanceInitiatedShutdownBehavior: 'stop'
      InstanceType: t2.micro
      IamInstanceProfile: !Ref EC2InstanceProfile
      KeyName: !Ref KeyName
      SecurityGroupIds:
        - !Ref EC2SecurityGroup
      SubnetId: !Ref PublicSubnetA
      Tenancy: default
      Tags:
        - Key: Name
          Value: !Sub ${EnvironmentName}-EC2-Instance
      UserData:
        Fn::Base64: |
          #!/bin/bash
          yum -y update
          amazon-linux-extras install php7.2 -y
          yum -y install mysql httpd php-mbstring php-xml gd php-gd
          systemctl enable httpd.service
          systemctl start httpd.service
          wget http://ja.wordpress.org/latest-ja.tar.gz
          tar zxvf latest-ja.tar.gz
          cp -r wordpress/* /var/www/html/
          chown apache:apache -R /var/www/html
          cd /var/www/html/
          mkdir healths
          cd healths
          touch wp-check

  # ------------------------------------------------------------#
  #  Database Subnet Group
  # ------------------------------------------------------------#
  RDSDBSubnetGroup:
    Type: AWS::RDS::DBSubnetGroup
    Properties:
      DBSubnetGroupDescription: RDS-SubnetGroup
      DBSubnetGroupName: !Sub ${EnvironmentName}-RDS-SubnetGroup
      SubnetIds:
        - !Ref PrivateSubnetA
        - !Ref PrivateSubnetC
      Tags:
        - Key: Name
          Value: !Sub ${EnvironmentName}-RDS-SubnetGroup

  # ------------------------------------------------------------#
  #  RDS Security Group
  # ------------------------------------------------------------#
  RDSSG:
    Type: AWS::EC2::SecurityGroup
    Properties:
      GroupName: !Sub ${EnvironmentName}-RDS-SG
      GroupDescription: Allow Request from WebServer
      VpcId: !Ref VPC
      SecurityGroupIngress:
        # http
        - IpProtocol: tcp
          FromPort: 3306
          ToPort: 3306
          SourceSecurityGroupId: !Ref EC2SecurityGroup
      Tags:
        - Key: !Sub ${EnvironmentName}-Name
          Value: !Sub ${EnvironmentName}-RDS-SG

  # ------------------------------------------------------------#
  #  RDS
  # ------------------------------------------------------------#
  RDSDatabase:
    Type: AWS::RDS::DBInstance
    Properties:
      AllocatedStorage: 20
      AllowMajorVersionUpgrade: false
      AutoMinorVersionUpgrade: false
      AvailabilityZone: ap-northeast-1a
      BackupRetentionPeriod: 0
      DBInstanceClass: db.t3.micro
      DBInstanceIdentifier: !Sub ${EnvironmentName}-RDS-Database
      DBName: !Ref DatabaseName
      DBSubnetGroupName: !Ref RDSDBSubnetGroup
      DeleteAutomatedBackups: false
      DeletionProtection: false
      Engine: mysql
      EngineVersion: !Ref EngineVersion
      MasterUsername: !Ref DatabaseMasterName
      MasterUserPassword: !Ref DatabaseMasterPassword
      MaxAllocatedStorage: 1000
      MultiAZ: false
      PubliclyAccessible: false
      StorageEncrypted: false
      StorageType: gp2
      Tags:
        - Key: Name
          Value: !Sub ${EnvironmentName}-RDS-Database
      VPCSecurityGroups:
        - !Ref RDSSG
上記のテンプレートをCloudformation に適用します
ステップ 1: スタックの作成
CloudFormationダッシュボードで**「スタックの作成」**をクリック。
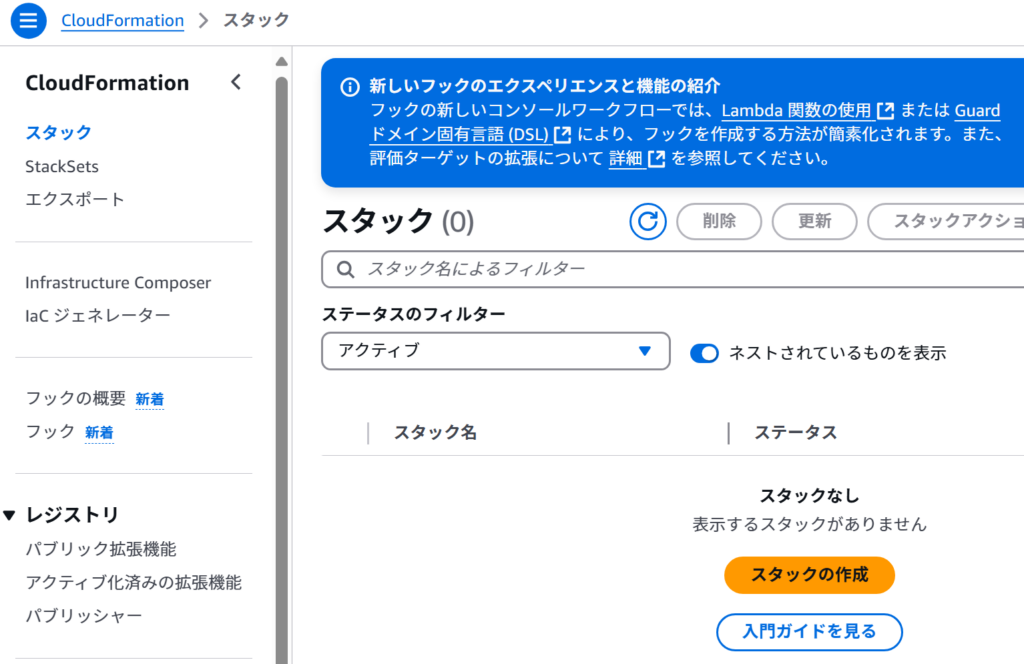
「既存のテンプレートを選択」をクリックして、「テンプレートファイルのアップロード」を選択。上記のファイルを.yml形式で保存してアップロードしてから「次へ」ボタンを押す
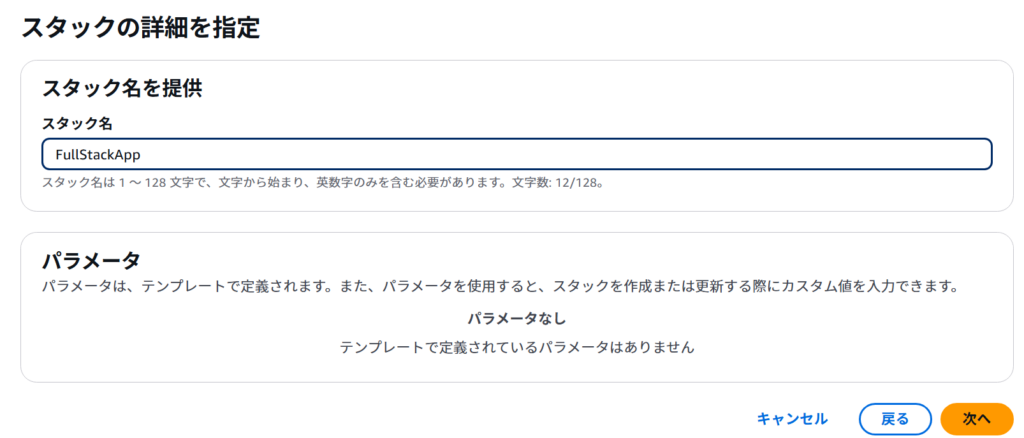
ステップ 2: スタックの詳細を指定
スタック名にわかりやすい名前を入力します(例: FullStackApp)
ステップ 4: オプションを設定
とりあえずスタックオプションは設定しなくて問題ないですが 、下記のように「新しく作成されたリソースをすべて削除する」を選択しておいたほうが楽です
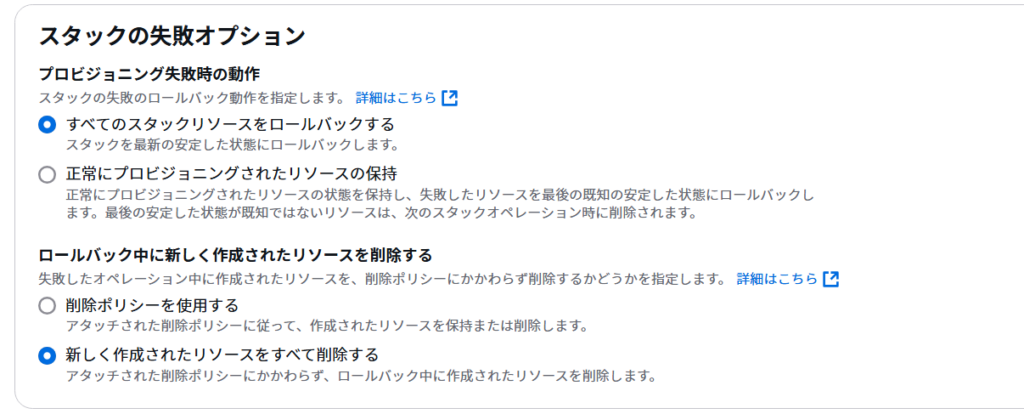
とりあえず、下記のチェックボックスにチェックして 「次へ」ボタン
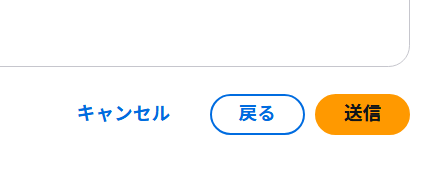
ステップ 5: スタックの確認と作成
最後に「送信」ボタンを押します
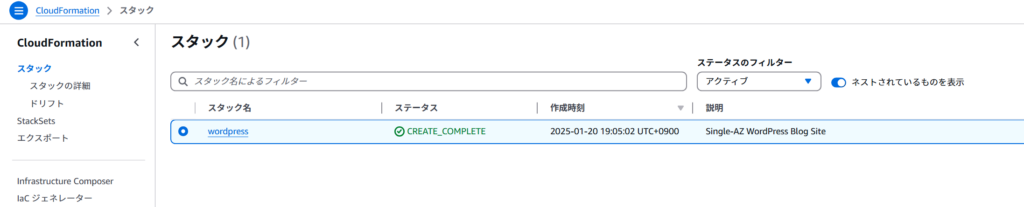
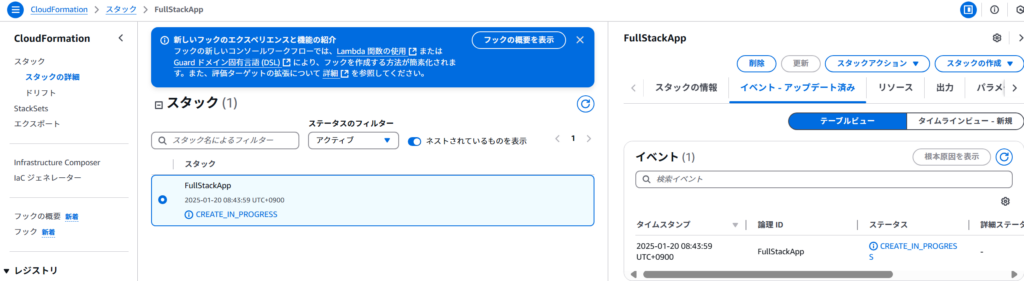
ステップ 6: スタックの進行状況を監視
CloudFormationダッシュボードでスタックのステータスを確認します。
- CREATE_IN_PROGRESSと表示されている間はリソースが作成中です。
タイムラインで進捗確認できます
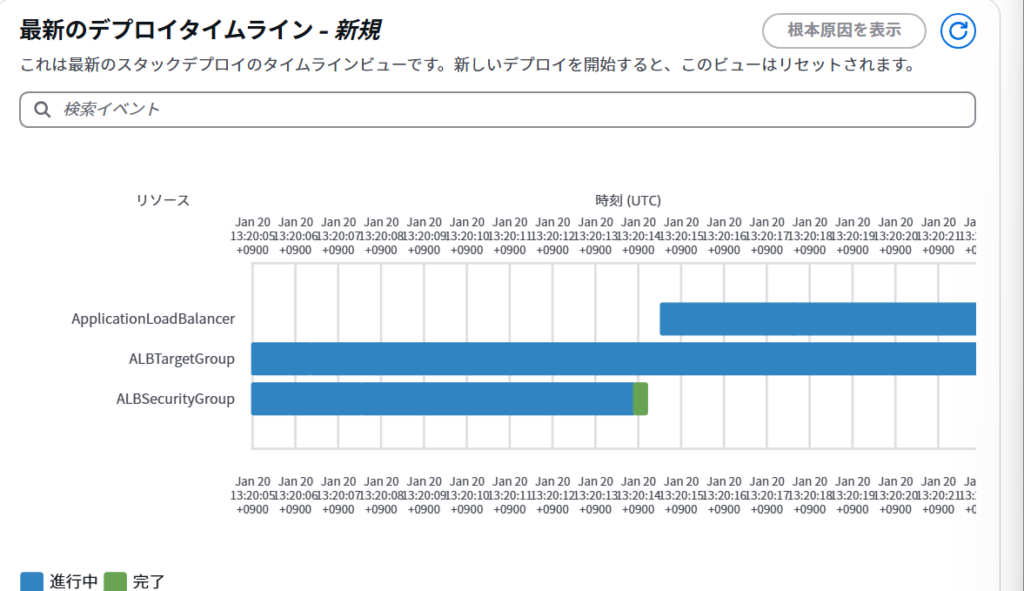
ROLLBACK_COMPLETEと表示されたら失敗です
失敗する際には、タイムラインビューを見るといいと思います
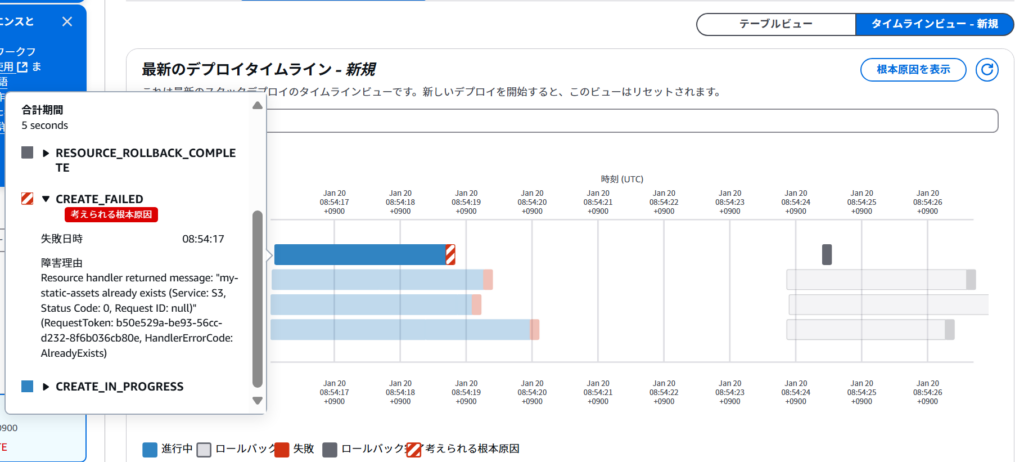
作成完了したら、CREATE COMPLETEとなります